3D Laser Scanning revolutionizing data collection
3D Laser Scanning technology is currently revolutionizing data collection in every phase of engineering architecture planning manufacturing and design and fabrication.
“…3D Laser Scanning will have an impact on the design and engineering world equal to the digital calculator or GPS technology…” H Tate Jones 2005
That statement is truer now than it was then. The technology is not only affecting the design and engineering world it is starting to be used in ways to span the imagination. There are multiple types of scanners and they range from scanners that literally map the globe on a regular basis, mounted to the space shuttle, to scanners that map your brain and are used by surgeons. Believe it or not the data format is basically the same from all these different types of scanners.
What is the technology?

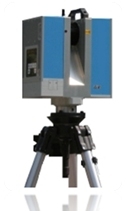
Z&F Phased based 3D Laser Scanner
3D laser scanning is a process involving the use of high speed lasers that fire at incredibly high rates of speed. There are two different types of scanners that are commonly used in 3D laser scanning in the context that I am writing about. Phase Based and Time of Flight. Phased base means that a constant beam of laser energy is emitted from the scanner and the change of phase of the laser light is measure to allow the scanner to calculate a distance. The advantage of this is higher point capture. Currently up to 2,000,000 points per second. The down side of this is much shorter range, currently about 30 meters.
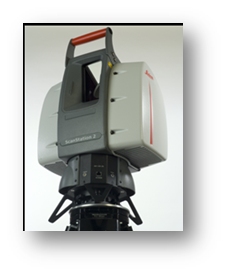
In a time of flight scanner a pulse of light is emitted from the scanner. The time it takes for the pulse to travel from the scanner to the object and back is measured allowing the scanner to calculate the distance. The key benefit to this type of scanner is longer range scanning. The down side of this type is that they do not collect as many points. Currently they collect about up to 50,000 points per second. For the reasons above the phase based technology is used inside more often and the time of flight is use outside more often. However best practice is that you used both inside and outside as necessary to get a very precise and accurate scan.
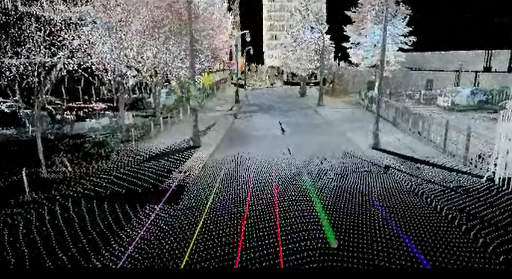
Both of these methods produce millions and sometimes billions of individual points. The points are located in space geometrically and have a very precise relationship to each other. As you can imagine this creates a very dense point group. These millions of points create a geometric hologram currently called a “Point Cloud”. The point cloud is a very exact replication of the 3D environment in the effective area around the scanner. So if the scanner is placed inside a building the interior is of that building is shown in great detail. So detailed that precise measurements can be made of the physical geometry of the surroundings. This points can be used to capture such irregular surfaces as the interior of an automotive plant with all the cables wires beams and moving parts that are contained in that environment. These point clouds can measure the buildup of snow on the side of a mountain. They can measure and represents roads, bridges, historic architecture, streets, towers, trees and millions of more examples. They can also measure very small microscopic items like the inside of a watch or very fine machined parts.
In order to be clear of the terms that are used in this field, below are some common terms that are used in the 3D Laser Scanning field:
Common Laser Scanning Terms:
Point Cloud Millions of points geometrically connected in space which are measurable.
Mesh Small triangles used to make a surface that can be read by a computer.
Modelling Building Cad models inside computer programs that represent building parts and can be measured and manufactured and tested.
Change Detection Making repeated measurements of the same surface at different times that can detect movement on a surface in the surface.
Clash Detection Comparing design models to other design models or point clouds.
Spherical Photography Photography that can be view in 360 degrees.
Noise Points around a scan that are not the surface of the object but are reflected off the object. These can be cleaned and removed from the scan data if necessary.
Traversing Moving a scanner from one point to another and keeping up with the geometry between points to establish the exact position of the 3D Scanner in space.
Laser Refraction This is caused by the laser passing through a window or opaque surface. Can also be caused by water. This must always be considered.


Leave a Reply
Want to join the discussion?Feel free to contribute!